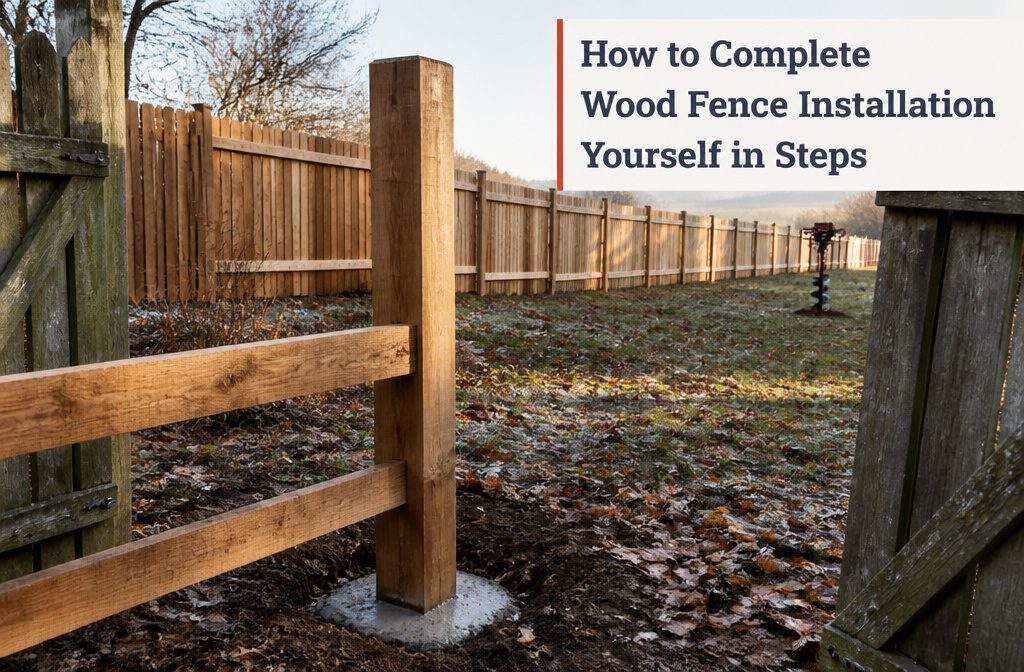
A DIY wood fence skips the labor in the $33.48–$53.87 per linear foot national estimate (May 2026), though you still rent an auger, miter saw and concrete mixer.
Post setting is the stage to slow down on. Attach rails before the concrete has cured 24 hours and the post sits out of plumb, which is hard to correct later.
1. Plan the Fence
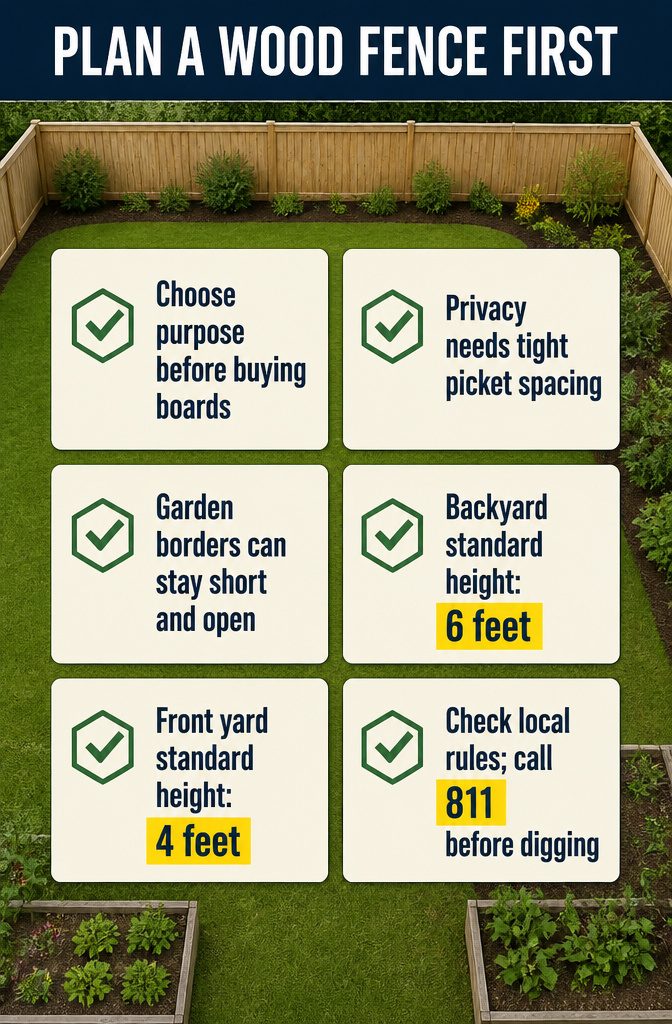
Decide what the fence is for before buying a board, since purpose sets height, picket spacing and how much reinforcement the posts and rails need. A privacy fence wants tight pickets, while a garden border can stay short and open.
Then check zoning codes and HOA rules.
Standard heights are 6 feet in a backyard and 4 feet in a front yard, but your local building authority has the final word. The same rules can also cover materials, setbacks and appearance.
Call 811 before you dig so underground utilities get marked. Striking a gas or electrical line turns a weekend project into an emergency.
Recommended Products
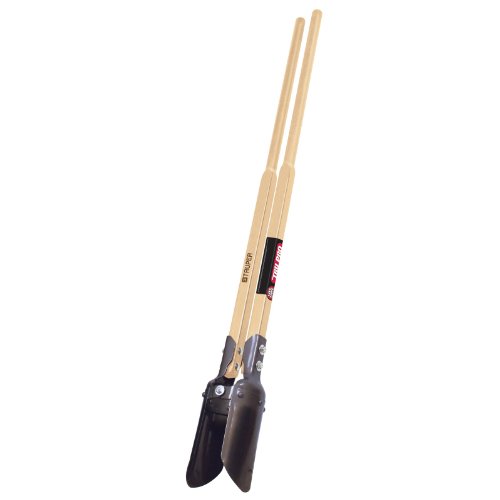
48-inch professional grade premium north american white ash handle
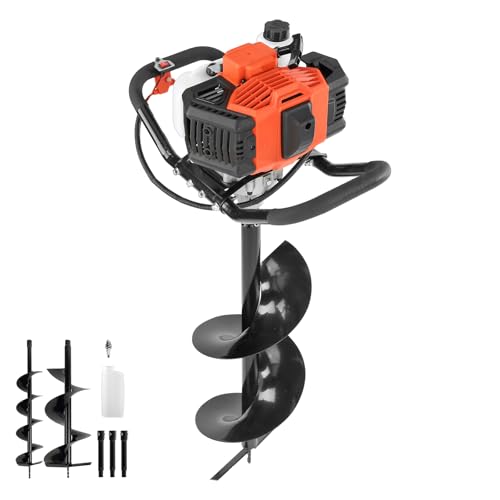
High-Performance Power: This post hole digger uses a 52 cc engine with speeds up to 9350 rpm. A gearbox with ball-bearing shafts and alloy gears adapts to sandy soil, wooded ground, and farmland. Use a 1:40 oil-to-gasoline mixing ratio, measure it with oil can
2. Choose Your Wood
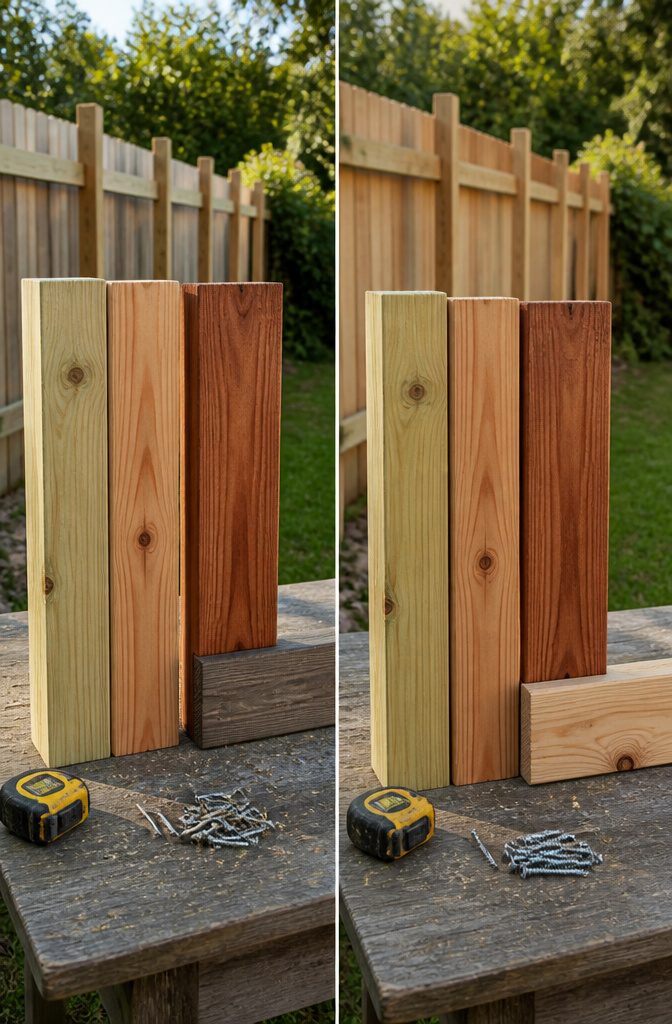
Cedar is the wood to buy if your budget stretches. It resists rot and insects on its own, holds its shape well, and its clean grain takes stain evenly.
Redwood performs much the same but costs more, so I’d save it for decorative pieces like a front-yard run or a gate, not the whole line.
Pressure-treated pine is the budget pick and easy to find. Plan on sealing or staining it, because bare boards check (develop small cracks) and break down under UV.
Whatever wood you pick, choose straight posts and rails with few knots and little warping. Use hot-dipped galvanized or stainless-steel fasteners so the hardware doesn’t corrode.
Recommended Products

EASY ORDERING: Everything you need for your fence project is in the box except for the final post. Only ONE additional post, BL19112, is required for the end of your project. A gate is available by searching BL19111.

【ABOVE 1500HRS SALT SPRAY TEST】FIXLINK wood screws have passed about 1500 hours salt spray test provide exceptional protection against rust and corrosion, specifically designed to work best with either pressure-treated lumber or composite decking. These deck screws for exterior can be exposed to the sun, humidity, rain, and snow conditions for a long time

TRUE ALL-ALUMINUM — BUILT FOR LONG-TERM VALUE: Ordinary steel or mixed-metal products can be progressing from surface corrosion to rust-through—often reported online within 0.5–2 years. So this is not simply about cosmetic maintenance—removing rust and repainting the surface. Once corrosion progresses to rust-through, the metal itself has deteriorated, potentially compromising the structural integrity and eventually requiring replacement of the affected component or structure. LukLoy post is built with a true all-aluminum structure for lasting outdoor over 30 years. it resists weathering, fading, and everyday exposure with less maintenance — a smarter long-term investment for your home.
3. Gather Your Tools and Materials
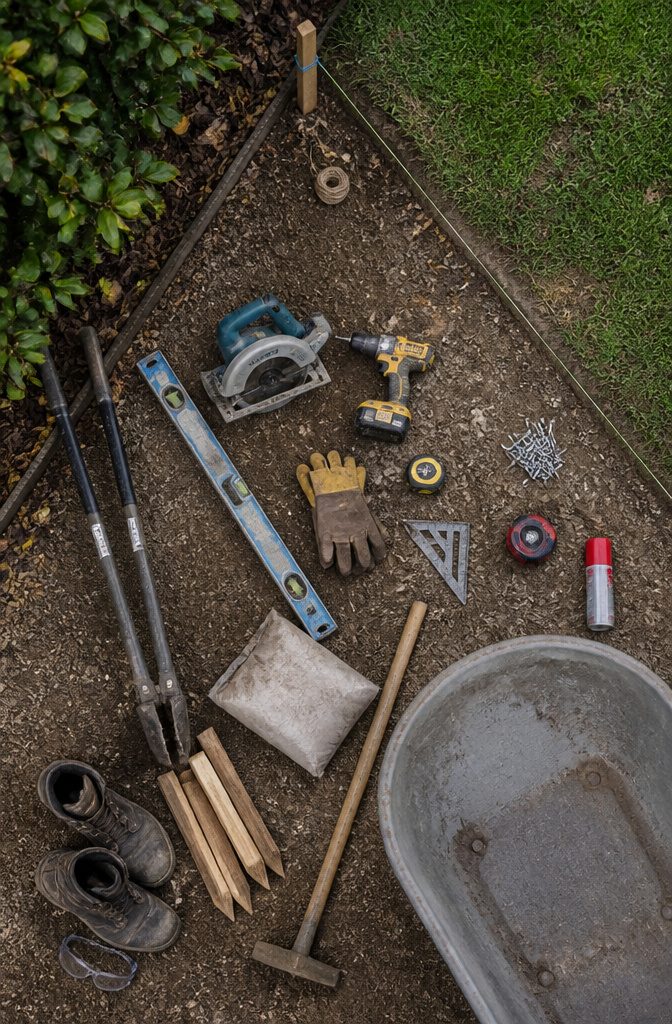
A wood fence goes faster when everything is laid out before the first hole is dug:
- Digging: post-hole digger or gas-powered auger. A power auger is optional but speeds up the work.
- Leveling: 4-foot level or post level.
- Cutting: circular saw or miter saw.
- Fastening: cordless drill with exterior-rated bits.
- Layout: tape measure, speed square, mason’s line, wood stakes, marking paint and a chalk line.
- Concrete: concrete mix or fast-setting post mix, a wheelbarrow and a mixing hoe.
- Protection: gloves, safety glasses and steel-toe boots.
Buy hot-dipped galvanized or stainless-steel fasteners. Plain steel corrodes outdoors, and a fence has hundreds of fasteners exposed to rain.
Recommended Products
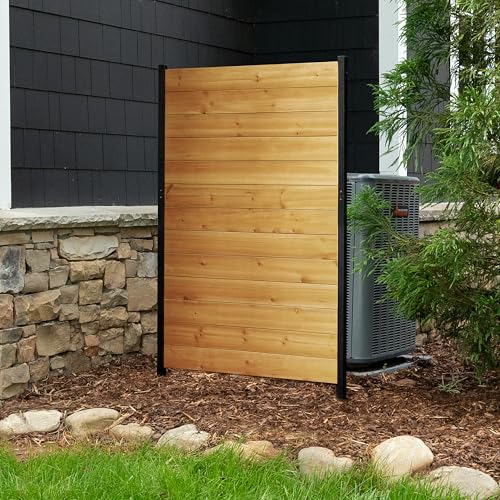
STYLISH NATURAL WOOD: This FSC certified wood screen is made with real wood meaning no two boards have the same grain color, finish, or wood knots differing it from vinyl outdoor privacy fence screen panels.

STYLISH NATURAL WOOD: This FSC certified wood screen is made with real wood meaning no two boards have the same grain color, finish, or wood knots differing it from vinyl outdoor privacy fence screen panels.

STYLISH NATURAL WOOD: This FSC certified wood screen is made with real wood meaning no two boards have the same grain color, finish, or wood knots differing it from vinyl outdoor privacy fence screen panels.
4. Mark and Dig Post Holes
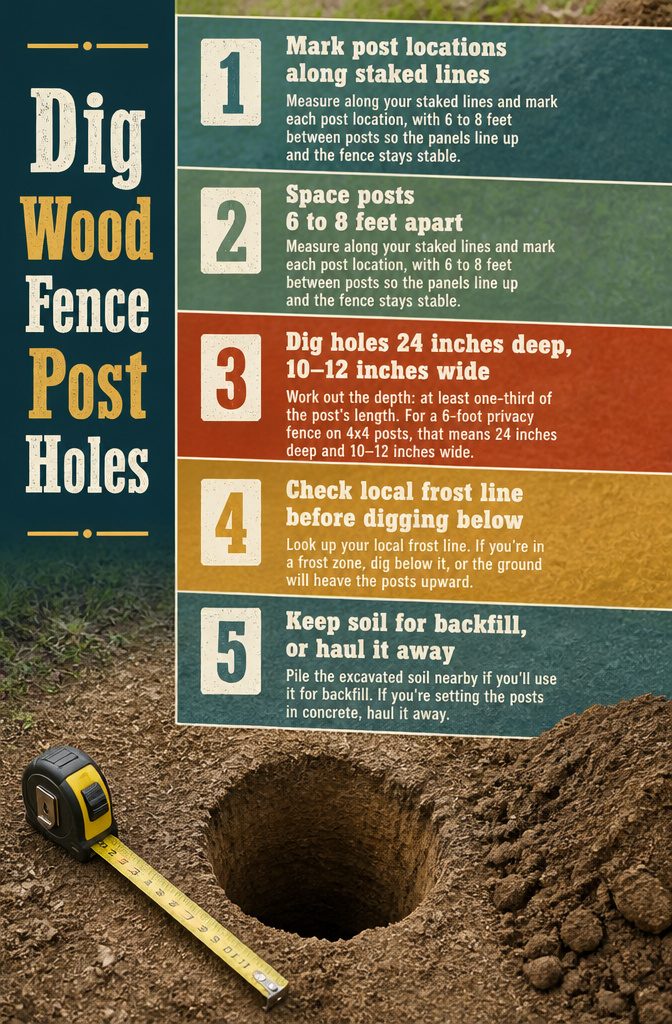
- Measure along your staked lines and mark each post location, with 6 to 8 feet between posts so the panels line up and the fence stays stable.
- Work out the depth: at least one-third of the post’s length. For a 6-foot privacy fence on 4×4 posts, that means 24 inches deep and 10–12 inches wide.
- Look up your local frost line. If you’re in a frost zone, dig below it, or the ground will heave the posts upward.
- Dig each hole with straight, uniform sides. Clean holes make the posts faster and more accurate to set.
- Pile the excavated soil nearby if you’ll use it for backfill. If you’re setting the posts in concrete, haul it away.
Recommended Products

Heavy-Duty 19 Gauge Hardware Cloth Construction: This hardware cloth is made from thick 19 gauge welded steel wire, creating a rigid and stable structure that holds its shape during installation. It is designed for outdoor and DIY applications where strength and durability are important.
Package Includes: You will get 400pcs hot diopped galvanized U shaped nails, For Wire OD:1/4" ; Leg Length:3/4"; Diameter: 0.078"; providing an ample supply for various fencing and securing projects

Package Includes: You will get 65pcs hot diopped galvanized U shaped nails, For Wire OD:1/4" ; Leg Length:1-1/2"; Diameter: 0.148"; providing an ample supply for various fencing and securing projects
5. Set the Posts
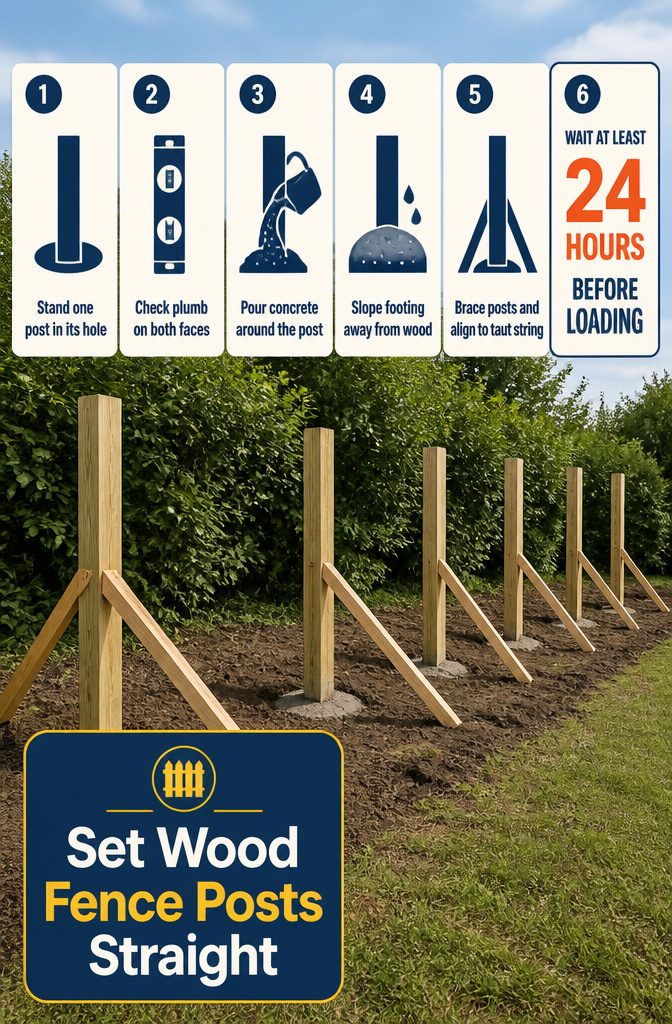
- Stand one post in its hole at a time.
- Check plumb on both axes with a post level, reading one face and then the adjacent face.
- Pour the mixed concrete around the post.
- Slope the top of the footing away from the post so water runs off instead of pooling against the wood.
- Brace the post with scrap 2x4s while the concrete cures.
- Pull a taut string between the terminal posts and line up each post along it, so the run stays straight.
- Wait at least 24 hours before attaching rails, panels or anything structural. Loading a post early disturbs the curing concrete and leaves it out of plumb, which is hard to correct later.
Recommended Products

This level has a magnetic strip and a rubber strap for convenient hands-free installation of posts, railings, pipes, and more

Hands-Free Strip Magnets: Strip magnets lock the level onto steel posts and pull flat to the surface.

POST & PIPE LEVEL: Accurate and ergonomic; this level features a tough; high-density molded body that promises unparalleled durability.
6. Attach Rails and Pickets
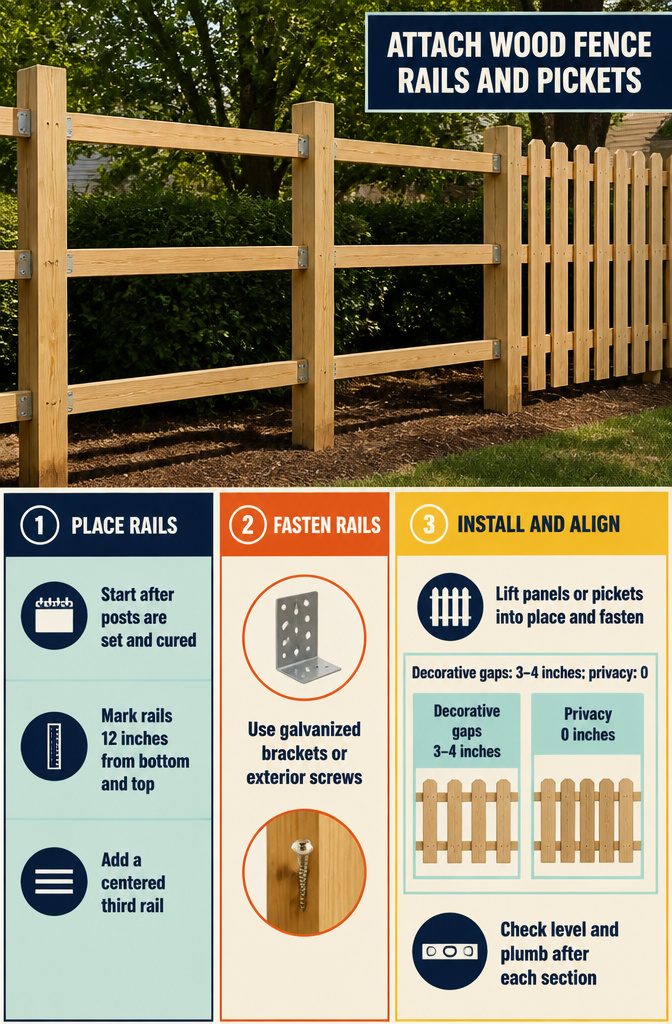
- Start only after the posts are set and cured.
- Mark three rail positions on each post: 12 inches from the bottom, centered, and 12 inches from the top.
- Fasten each rail with galvanized brackets, or toe-screw it into the posts with exterior-grade screws. For a first fence, I’d use brackets, since they’re easier to line up than angled screws.
- With prefabricated panels, lift each one between the posts, shim it level, and fasten it with mounting brackets or structural screws.
- With individual pickets, clamp a spacer jig to keep the gaps even: 3–4 inches for a decorative fence, 0 inches for privacy.
- Check level and plumb after every panel or few pickets. Small misalignments add up to visible waves and uneven tops.
Recommended Products

FORGED STEEL BLADES: Features heavy-duty, heat-treated forged steel blades designed for powerful earth-piercing and clean, consistent soil extraction

Efficient Fence Installation: Install fence posts faster with less effort. This manual T post driver uses controlled lift-and-drop motion to drive T posts, U channels, metal stakes and wooden posts securely into the ground without the need for a sledgehammer

Powerful Performance: This electric post hole digger is equipped with a high-power 1500W motor, capable of drilling holes up to 5.91 in (150 mm) in diameter and 36.42 in (925 mm) deep. Whether dealing with hard soil or soft earth, it delivers stable and efficient drilling power, making it easy to complete tasks like fence installation or tree planting for home or farm projects
7. Install the Gate
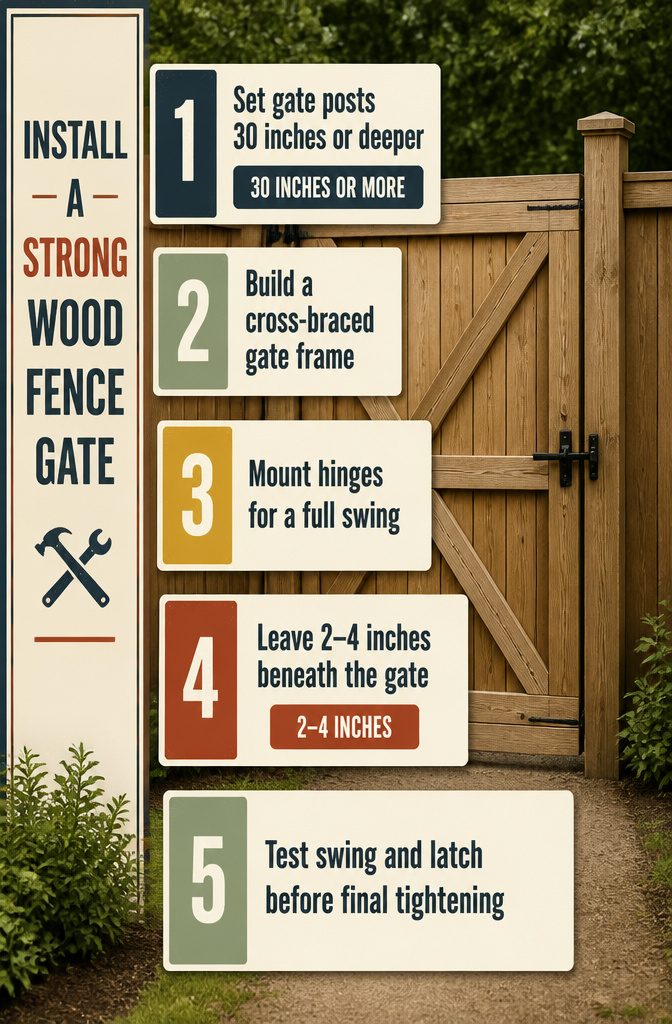
Gates take more movement and stress than any other part of the fence, so put the extra money into heavy-duty hardware and a reinforced frame.
- Set the gate posts deeper than the line posts, 30 inches or more. A heavier gate needs deeper posts.
- Build the gate frame with cross-bracing, or buy a gate kit that includes it. The brace is what stops sag.
- Mount the hinges on the post side, leaving room for a full swing and 2–4 inches of clearance beneath the gate so it doesn’t drag on the ground.
- Attach the latch hardware so the gate closes securely.
- Swing the gate and work the latch several times to check alignment. Tighten everything for good only after it passes.
Recommended Products

DIMENSIONS: Each panel measures 32” H x 48” W

Innovative Design: The wooden fence panels posts features a U-channel design—simply attach the brackets to the posts and slide in (3/4" x 5.5") wood planks to lock. Easy DIY installation and plank replacement, even for one person, saving time, effort, and labor costs in the short and long term
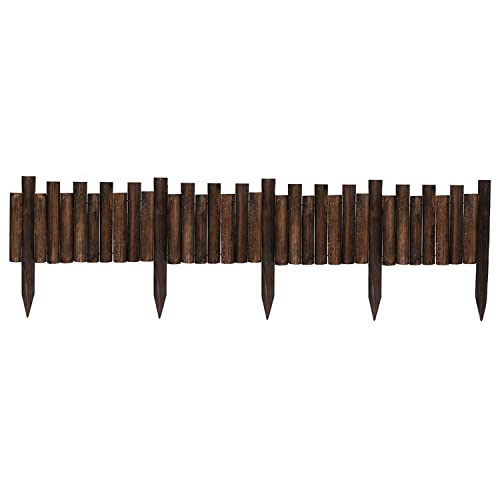
About the Edging: 8 inch height above ground, stakes Height 4 inch, 3.6 Feet total Length; Made from sturdy wood with a carbonized finish, this short fence is durable and long-lasting, standing up to outdoor elements.
8. Sand and Finish the Wood
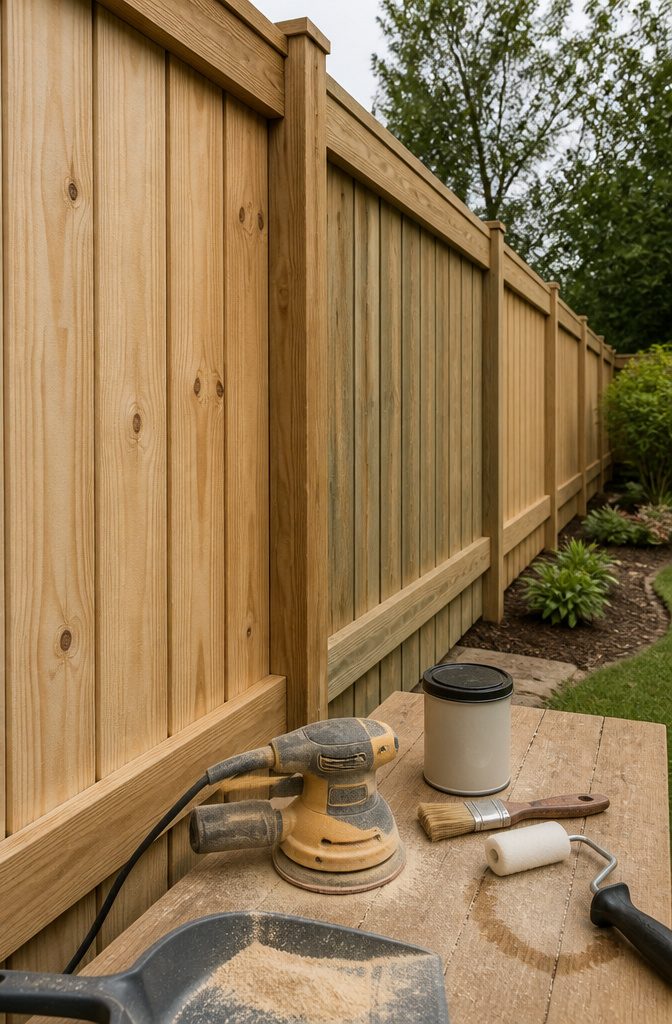
Run an orbital sander with 60–80 grit paper over every rough cut, splintered end and uneven face before any finish goes on. Raw ends on pickets and rails snag hands and clothing, and they take stain unevenly.
Pressure-treated lumber needs patience first. Let it air dry 2–4 weeks before sealing, or the finish can blister or soak in poorly.
I would still seal it. The treatment resists decay, but a sealant adds durability and keeps the wood looking good longer.
Choose a penetrating sealant or a UV-blocking exterior stain, and apply it with a brush, roller or sprayer. Afterward, sweep up the sanding dust and wipe off drips before they dry.
Recommended Products

DIMENSIONS: Each screen measures 47in H x 48.125 W

STYLISH NATURAL WOOD: This FSC certified wood screen is made with real wood meaning no two boards have the same grain color, finish, or wood knots differing it from vinyl outdoor privacy fence screen panels.
Innovative Design: The wooden fence panels posts features a U-channel design—simply attach the brackets to the posts and slide in (3/4" x 5.5") wood planks to lock. Easy DIY installation and plank replacement, even for one person, saving time, effort, and labor costs in the short and long term
What Wood Fence Installation Costs
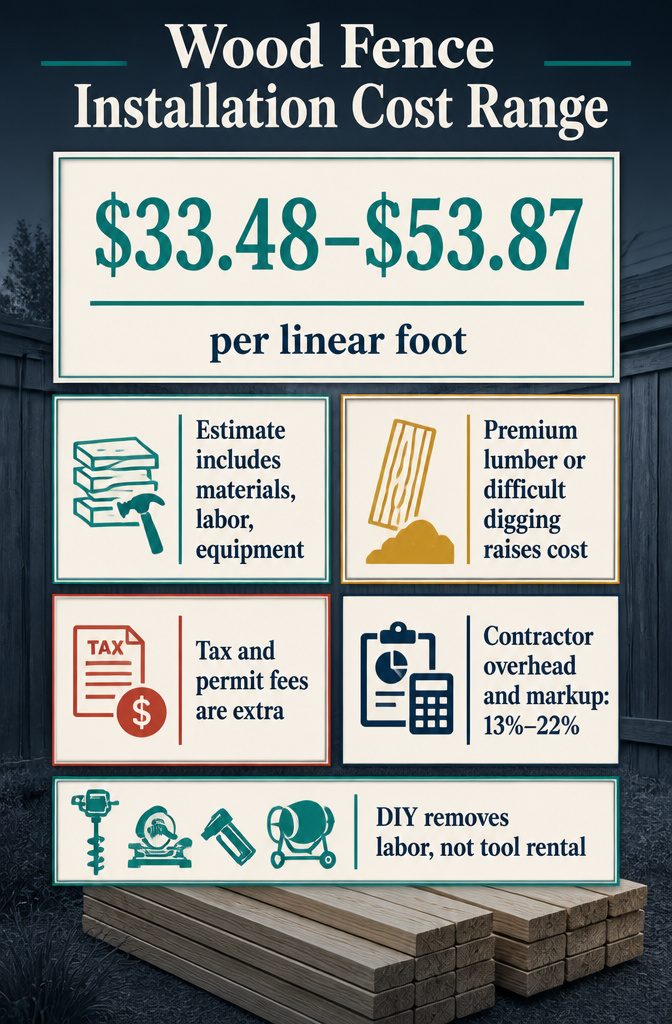
The national estimate for wood fence installation is $33.48–$53.87 per linear foot as of May 2026. That figure covers boards, rails, pressure-treated posts set in concrete, fasteners, labor and equipment.
Your actual cost will shift with site conditions, local requirements, labor choices and materials, and premium lumber or a yard that is hard to dig pushes it toward the top of the range or past it.
Three costs sit outside that range: sales tax, permit fees, and 13% to 22% overhead and markup if a general contractor supervises the job.
Building the fence yourself removes the labor line, but you will still pay to rent a post hole auger, miter saw, nailer and concrete mixer. I’d get written quotes before locking in a budget.
Recommended Products

【Heavy Duty Material】 High-strength low-carbon steel core provides superior durability, flexibility, and a solid foundation for long-lasting performance.

High-Quality Raw Materials: Welded from strong low-carbon steel wire for stability and toughness. Each weld is reinforced and coated with a thick hot-dip galvanized layer for long-lasting corrosion resistance.

High quality raw materials: Our hardware cloth chooses the strength, toughness and ductility of low carbon steel wire as the inner core. This determines the basis of the high quality of our products
Maintain Your Fence
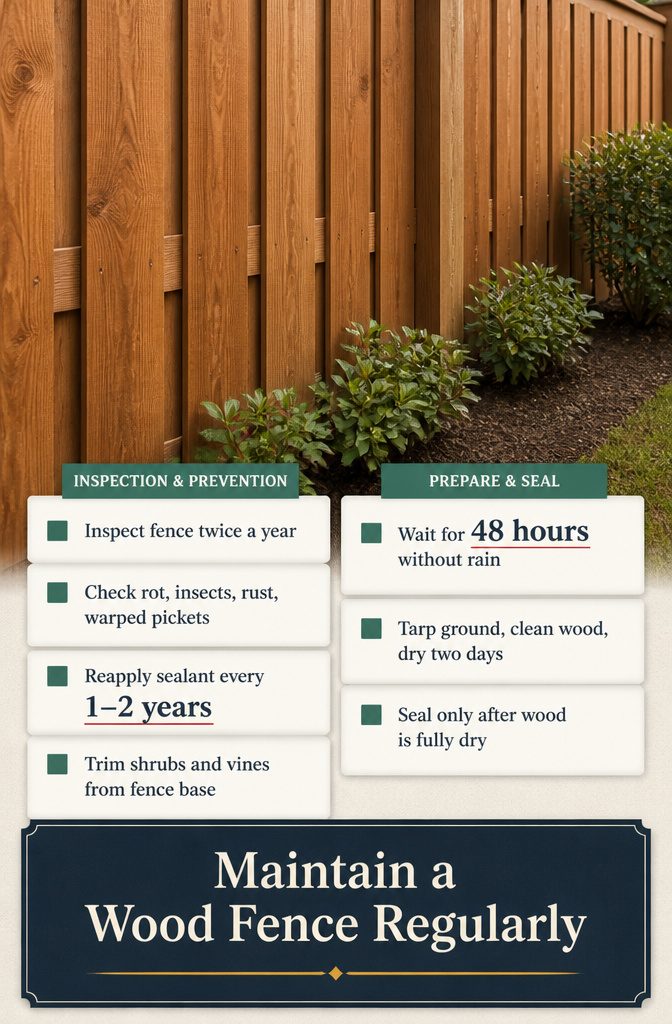
Walk the fence twice a year and look for dry rot, insect activity, corroded fasteners and warped pickets.
Both pressure-treated southern yellow pine and western red cedar need regular upkeep, so plan to reapply sealant every 1–2 years, closer to one year where the weather is harsh.
Cut back shrubs and vines near the base of the fence, because they hold moisture against the wood and block airflow.
Before you seal, check that the forecast shows 48 hours without rain. Lay a tarp over the ground along the fence, clean the wood, and let it dry for two days.
Then apply the waterproof sealant. Rushing the drying step is the shortcut I’d skip, since sealing damp wood traps moisture inside.
Recommended Products

ADJUSTABLE - The Kapro 340 Postrite is unique among post levels because it can be collapsed either by folding it closed like a book or by spreading it flat. It "clicks locked" every 15° allowing the Kapro 340 Postrite to be used on pipes or posts of any diameter.

Strip magnets and rubber strap for hands-free work

Product 1: This level has a magnetic strip and a rubber strap for convenient hands-free installation of posts, railings, pipes, and more
Frequently Asked Questions
How do I install a wood fence myself?
Work in this order: plan the fence and call 811, choose your wood, gather tools, dig and set the posts, attach rails and pickets, hang the gate, then sand and seal.
Posts go 6 to 8 feet apart in holes at least one-third of the post length deep, and they need 24 hours to cure before you attach anything. Finishing with a sealant protects the boards from moisture and sun.
How much does wood fence installation cost, and what would 200 feet run?
Wood fence installation averages $33.48–$53.87 per linear foot as of May 2026, so 200 feet comes to roughly $6,696–$10,774. That range covers materials, labor and equipment.
Sales tax, permit fees and a 13% to 22% contractor markup are extra. Building it yourself removes the labor charge, but you still pay to rent tools like a post hole auger and concrete mixer.
How tall can my fence be?
Standard residential limits are 6 feet in a backyard and 4 feet in a front yard. Your local building authority sets the actual limit, and an HOA may add its own rules, so confirm both before you buy materials.
Do I need to treat pressure-treated wood?
Yes.
The factory treatment resists decay, but a sealant or UV-blocking stain adds durability and keeps the boards looking good longer. Let the lumber air dry 2–4 weeks first, since sealing wet wood can cause blistering or poor absorption.
What is the hardest part of building a fence?
Setting the posts is usually the hardest part, because both alignment and footing depth have to be right.
Dig at least one-third of the post length deep, check plumb on two faces, and wait at least 24 hours before putting any load on the post. A post that sets crooked is difficult to correct afterward.